You have spend weeks and months designing and building your WooCommerce website. The products are perfect, the design is awesome, and you’re ready to show it to the world. But before you hit the “Launch” button, it’s crucial to make sure everything is in place for a smooth and successful launch. This comprehensive checklist will guide you through the essential pre-launch steps, ensuring you’re prepared to welcome your first customers.
I. Store Setup & Configuration:
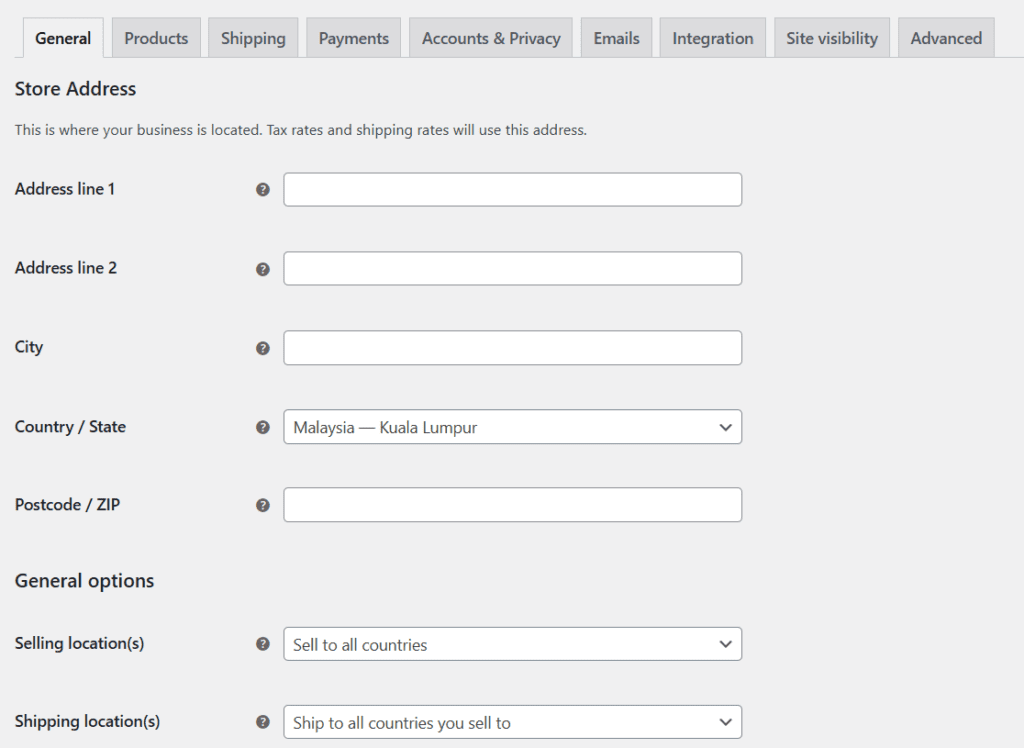
- General Settings:
- Store Name, Address, and Contact Information: Double-check for accuracy.
- Currency and Measurement Units: Confirm they align with your target audience.
- Time Zone: Ensure it’s correctly set for order processing and notifications.
- Product Catalog:
- Product Pages: Verify all product details, descriptions, images, and pricing are accurate and compelling.
- Product Categories and Tags: Organize your products for easy navigation.
- Inventory Management: Set up stock tracking and alerts to avoid overselling.
- Product Variations: If applicable, ensure all variations (size, color, etc.) are correctly configured.
- Digital Products (if applicable): Verify download links and access permissions.
- Shipping & Delivery:
- Shipping Zones and Methods: Configure shipping options for different regions.
- Shipping Rates: Calculate accurate shipping costs and set up appropriate methods (flat rate, table rate, real-time carrier rates).
- Handling Fees: Include any handling fees if applicable.
- Shipping Integrations: If using a shipping service, ensure it’s properly integrated.
- Return Policy: Clearly define your return policy and make it easily accessible.
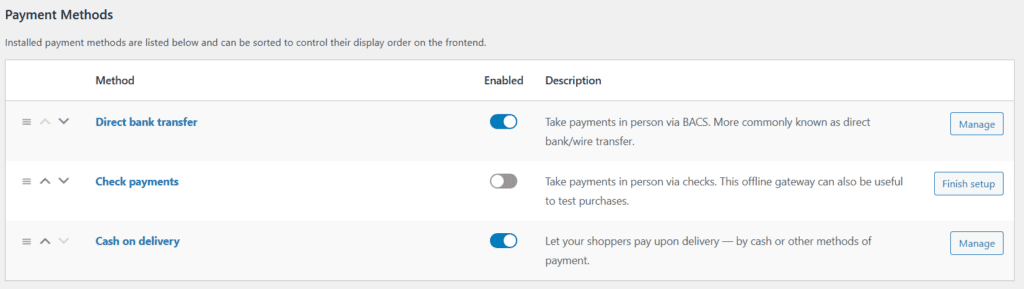
- Payment Gateways:
- Payment Gateway Integration: Set up your preferred payment gateways (PayPal, Stripe, etc.).
- Test Transactions: Conduct test transactions to ensure payment processing works smoothly.
- Payment Confirmation Emails: Customize confirmation emails to reflect your branding.
Read WooCommerce Payment Gateway Malaysia to get more information about local payment gateway for WooCommerce stores in Malaysia.
- Taxes:
- Tax Settings: Configure tax calculations based on your location and regulations.
- Tax Plugins: If necessary, install and configure tax calculation plugins.
- Legal Pages:
- Privacy Policy: Create a comprehensive privacy policy outlining data collection and usage.
- Terms and Conditions: Draft clear terms and conditions for using your website.
- Disclaimer: Include any necessary disclaimers relevant to your products or services.
- Email Notifications:
- Customize Email Templates: Personalize order confirmations, shipping updates, and other automated emails.
- Test Email Delivery: Ensure emails are being sent and received correctly.
II. Design & User Experience:
- Theme Selection & Customization:
- Choose a Responsive Theme: Ensure your website looks good on all devices (desktops, tablets, mobiles).
- Customize Theme Settings: Adjust colors, fonts, and layout to match your brand.
- Logo and Branding: Upload your logo and ensure consistent branding throughout the site.
- Navigation & User Flow:
- Main Menu: Create a clear and intuitive main menu for easy navigation.
- Product Search: Ensure the product search function is working correctly.
- Checkout Process: Simplify the checkout process to minimize cart abandonment.
- Mobile Optimization: Test the entire user experience on different mobile devices.
- Content & Copywriting:
- About Us Page: Craft a compelling “About Us” page to connect with your customers.
- Contact Us Page: Provide clear contact information and a contact form.
- Blog (Optional): If you plan to have a blog, create some initial content.
- Product Descriptions: Write engaging and informative product descriptions.
- Homepage Content: Design an effective homepage that showcases your products and brand.
III. Marketing & SEO:
- SEO Optimization:
- Install an SEO Plugin (Yoast SEO, Rank Math): Configure the plugin and optimize your website’s SEO.
- Keyword Research: Identify relevant keywords for your products and target audience.
- On-Page Optimization: Optimize product titles, descriptions, and meta descriptions for target keywords.
- URL Structure: Ensure your website has a clean and SEO-friendly URL structure.
- Analytics & Tracking:
- Google Analytics: Set up Google Analytics to track website traffic and user behavior.
- Google Search Console: Connect your website to Google Search Console for insights into search performance.
- Conversion Tracking: Configure conversion tracking to measure the effectiveness of your marketing campaigns.

- Social Media Integration:
- Social Media Profiles: Create or optimize your social media profiles.
- Social Sharing Buttons: Add social sharing buttons to your product pages.
- Email Marketing Setup:
- Email Marketing Platform: Choose and set up an email marketing platform (Mailchimp, Constant Contact, etc.).
- Email List Building: Implement strategies for collecting email addresses.
IV. Testing & Security:
- Functionality Testing:
- Test All Links: Ensure all internal and external links are working correctly.
- Test Forms: Verify contact forms, checkout forms, and other forms are functioning properly.
- Test Product Purchases: Complete test purchases to simulate the customer experience.
- Browser Compatibility: Test your website on different browsers (Chrome, Firefox, Safari, Edge).
- Security:
- SSL Certificate: Ensure you have an active SSL certificate (HTTPS).
- Security Plugins: Install and configure security plugins to protect your website.
- Regular Backups: Set up regular backups of your website and database.
- Performance Testing:
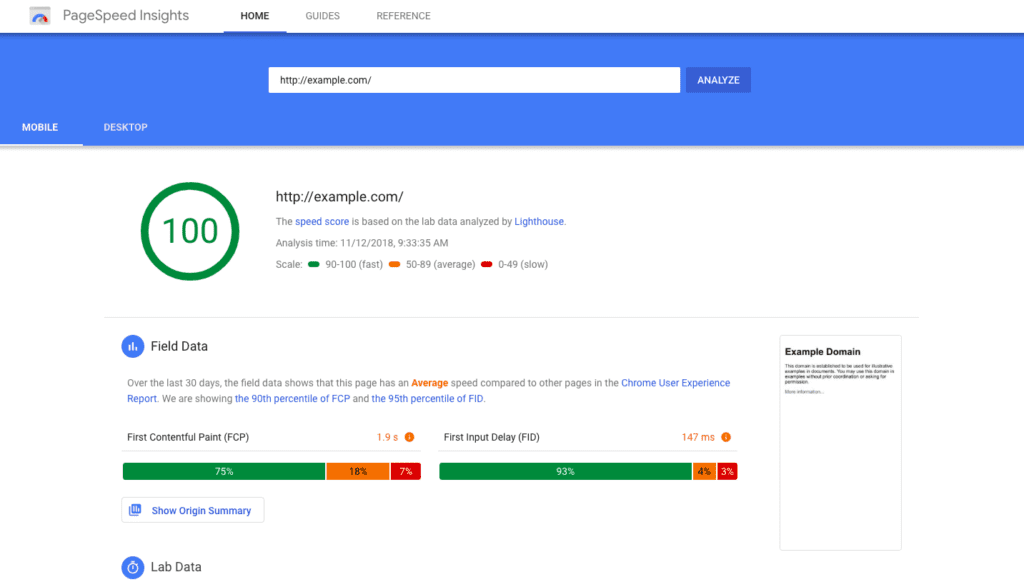
- Website Speed: Test your website’s loading speed and optimize for performance.
- Mobile Responsiveness: Ensure your website is fully responsive on all devices.
V. Final Preparations:
- Domain & Hosting:
- Domain Name: Ensure your domain name is registered and pointed to your website.
- Hosting: Confirm your hosting plan is sufficient for your expected traffic.
- Launch Announcement:
- Prepare a launch announcement for your email list and social media channels.
- Schedule your launch announcement for maximum impact.
- Backup Your Website: Perform a final backup of your entire website before launching.
VI. Post-Launch:
- Monitor Your Store: Keep a close eye on your website’s performance, traffic, and sales after launch.
- Gather Feedback: Encourage customers to provide feedback on their experience.
- Make Adjustments: Be prepared to make adjustments based on customer feedback and performance data.
- Continue Marketing: Don’t stop marketing after launch! Keep promoting your store and products.
By following this comprehensive checklist, you’ll be well-prepared to launch your WooCommerce store successfully and start selling! Remember, launching is just the beginning – continuous improvement and adaptation are key to long-term success in the world of e-commerce. Good luck!
Geeks Working (M) Sdn Bhd is a 100% local talents software development house, if you need help in WooCommerce design or development…